Physical Address
304 North Cardinal St.
Dorchester Center, MA 02124
Physical Address
304 North Cardinal St.
Dorchester Center, MA 02124
Hello, here in this article, you will detailed review of the Convertkit.
Building an email list has become crucial for small businesses, marketers, content creators, or any business that wants to utilize email marketing for their existing business.
The biggest challenge beginners face in email marketing is most platforms are not beginner-friendly.
That’s where Converkit comes in and is helping content creators with a simple, user-friendly interface and effective email marketing service.
Here you will find a detailed review about convertkit, and you may decide to make a purchase based on this review.
I have been using the convertkit for a very long time.
Initially, while I was searching for an email marketing tool,
I found out about convertkit.
I got hooked to convertkit because of the easy user interface, ‘which made delivering content upgrades easily and their email deliverability was the best.
Convert platform has been through many changes.
They have redesigned their app and added new features.
One such feature is the visual automation builder.
So I have signed for Convertkit’s 14-day free trial, and I am setting up my email marketing system for elearndigital as I am writing this post.
You can just signup for a 14-day free trial and follow the steps provided on this guide and check for yourself. There is no need to enter your billing information for a 14-day free trial.
Once you signup Convertkit has a visual walkthrough tutorial for you guys, a complete checklist for you to follow.
To make it easy for you, these are the things I would follow in building my email marketing system.
Fill out my Account information completely – It is crucial to update your information in your email marketing system.
Create My Signup Form- I will create a simple opt-in form to collect email ids on my lead magnet.
Create My first email sequence- I will setting up my first email sequence of welcome emails where once a subscriber signups for my email list.
My automation sequence would send a welcome mail.
Design by visual automation workflow- once you have built the opt-in form and email sequence. It is easy to set up your visual automation workflow.
Add Your Billing Information- Once I finish all my setup I would update my billing info.
The first thing we have to do is fill up our basic account settings.
In convertkit, there aren’t too many settings to jumble around with and that is a relief.
So, fill up your basic account information and billing info, the most crucial settings are on the “email” tab within the account settings.
You may access your account settings by clicking your website name at the top right corner.
The email tab will look like this:-
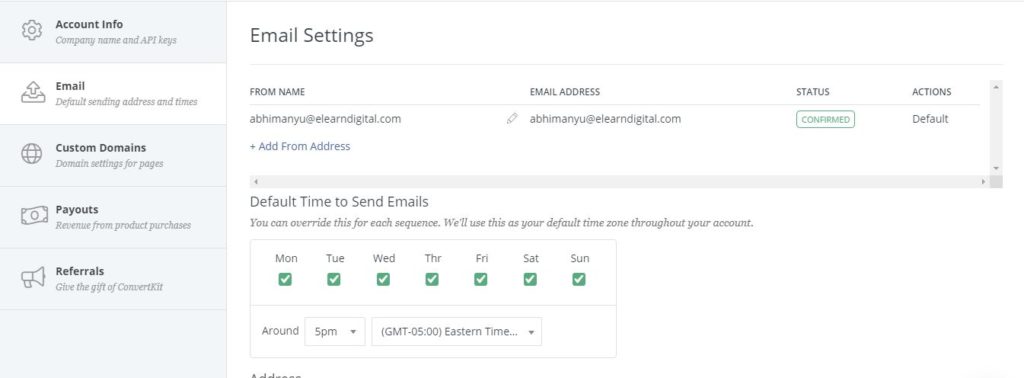
From name & email:- You need to set up your email address, from which you will send emails to your subscribers.
You will have to also verify your email address for authorizing your email address.
Always make sure that you are using your name or blog name in your email address. Your subscribers can recognize you with your name or blog name.
Setting up your timezone- Here you get an option to send your emails on specific days or send emails every day.
You can set up a specific time when your emails have to be sent to your subscribers.
Your Address – To Comply will CanSpam act Every Email has to have a mailing address in an email.
On the top right corner of your account,
you will get an option of email templates where you can view and choose any template you like.
You can even set default templates for your newsletters.
There is an option to invite your team members, assign them roles of admin or editor.
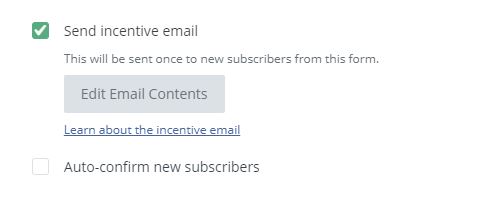
Before Sending any emails on Converkit you will have to provide some information to get your account approved.
This is a security measure taken by the email service provider
So that people don’t misuse their services.
The security measure is used to keep the spammers away from harming their company’s reputation.
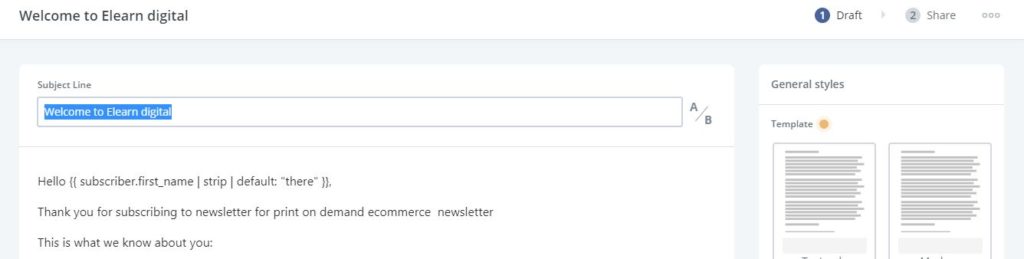
To get approved on convertkit, add a basic email with your welcome information and save it as a draft.
Once you change the email newsletter settings from draft to published, you will get the form shown below with the security questions.

Fill out the form shown above and submit it. Convertkit’s team will reach out to you for the approval process. The approval process might happen in few hours, or it might take a day or two, to approve your account.
A welcome series is several email sequences you set for your subscribers once they join your email list.
This strategy helps you to automate your emails and educate and engage your audience with valuable information.
Welcome series usually range in 3-7 emails depending on your industry.
Why you should invest in welcome series emails?
What you can achieve from the welcome email series?
What should you write in your email series?
There are two options available for you to set up your emails in convertkit.
You may use the rich text editor or HTML version.
I recommend sticking with a rich text editor for the welcome series.
You may use an attractive HTML version for promoting special deals.
Also, keep in mind not to use too many graphics in HTML versions as it makes the emails heavy and would result in deliverability issues.
In the rich text editor, you have to just copy-paste your email draft.
You can set up triggers while adding links.
When a subscriber takes an action like clicking on any link, you can add a tag on the user who is clicking the link.
Edit link
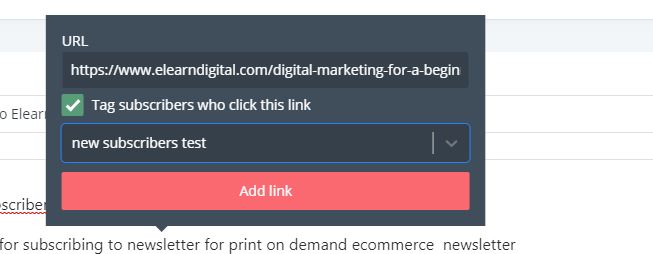
One of the tags I have added to the email was where I ask the subscribers to fill out a survey.
You can filter out the people who have clicked on your emails and set up a reminder email who have not taken any action on the emails.
The best part of this sequence is, emails will be sent only to people who have not taken any action.
You can even reorder your email sequence on the tab from the left-hand side of your email dashboard.

You can live metrics information under your sequences.
Go to your sequences tab and click on reporting button to check the open rates and click rates.
Creating forms in convertkit is easy. You can click on the new form button and select the form which you want.
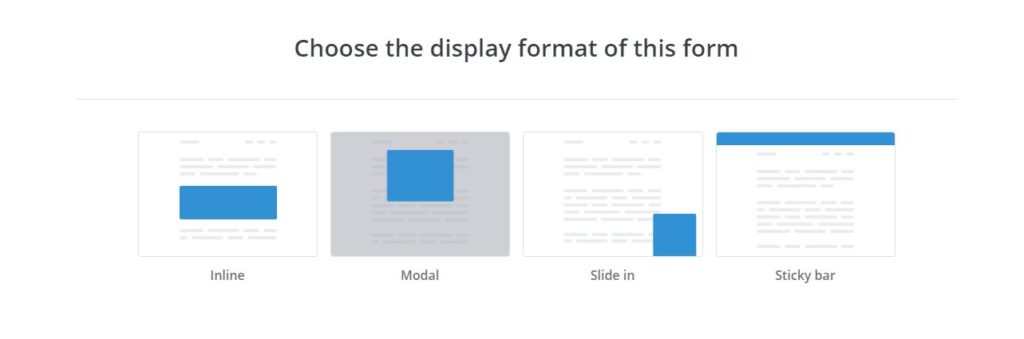
I will be selecting the inline form as I don’t need the other two form types.
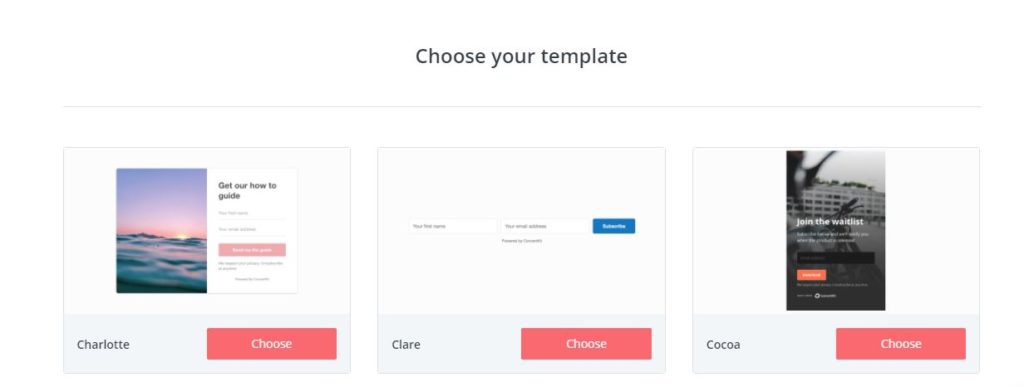
I can choose which templates I want and open up the editor
The menu section is on the top & you can click on the form name on the left and replace it.
There is also a menu on the right-hand side.
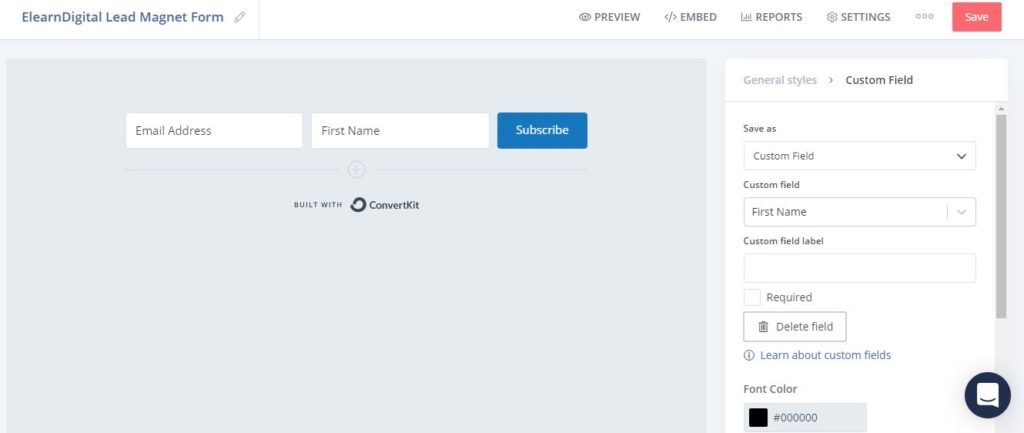
You can customize your form fields by clicking on the plus sign.
You can add custom fields like phone no.
After you customize your form elements, You can click on the top part of the menu on the right.
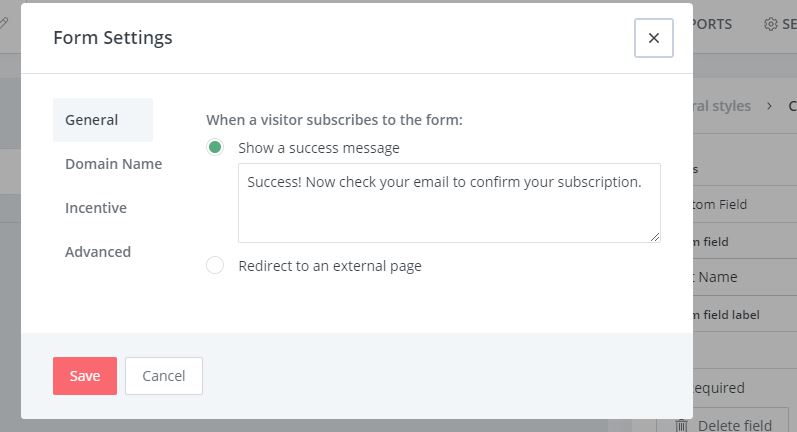
I usually redirect people to a thank you page, where I inform the subscribers how to confirm their email addresses.
After setting up the form you can set up your confirmation email.
Every email service provider has a setting of the confirmation email, but this email setting is limited to specific to one email per account.
But in Convertkit you can customize the confirmation email on a form or landing page.
Here we go to the advanced settings Menu :
The best feature here is we can show custom content to your subscribers.
We can also add reCAPTCHA to stop bots.
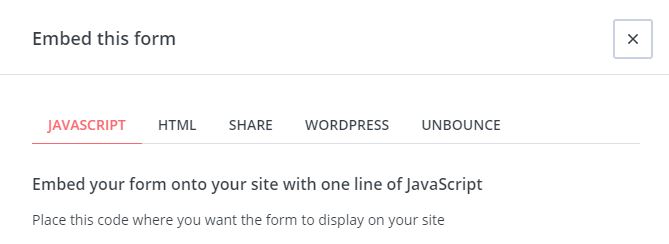
And once our form is complete, we can click on the embed button.
You can add the form to your website using javascript, HTML, or Use a WordPress shortcode.
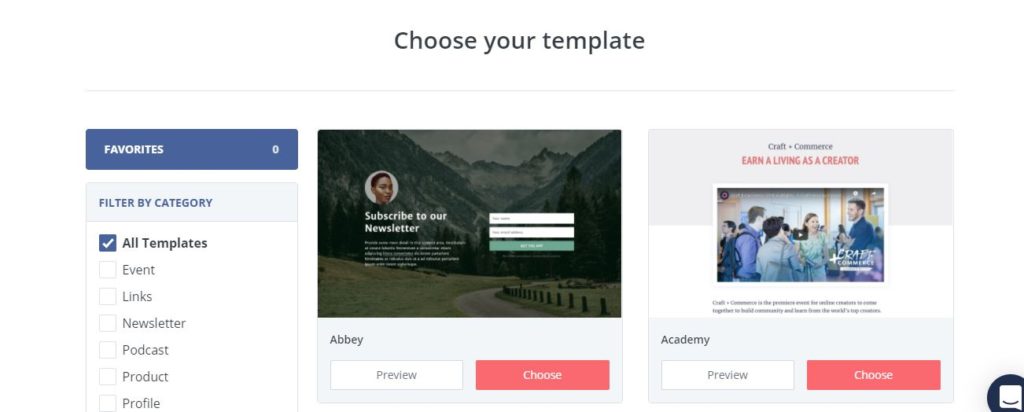
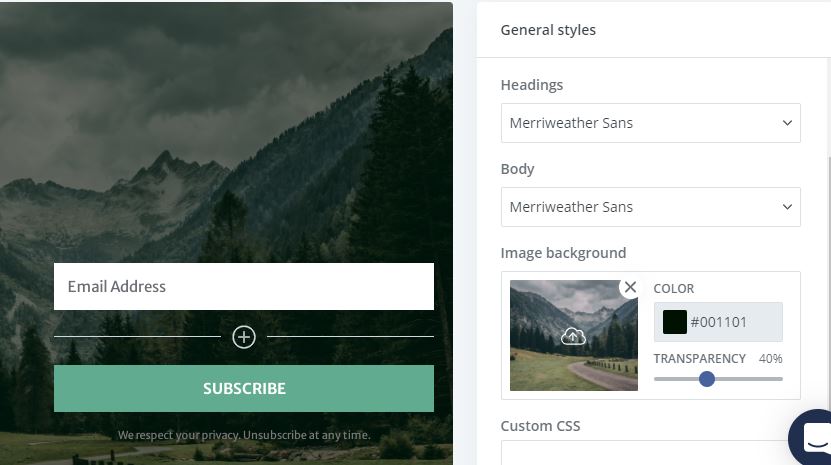
Creating the landing page you have to click on the landing page templates.
You can select the templates according to your needs.
You can customize the page by clicking on specific elements on the page.
Each element has its settings that appear on the right-hand side.
You can change the font size, color, & format the font.
You get a few extra settings on the styles pages, where you can change the background of your landing page template.
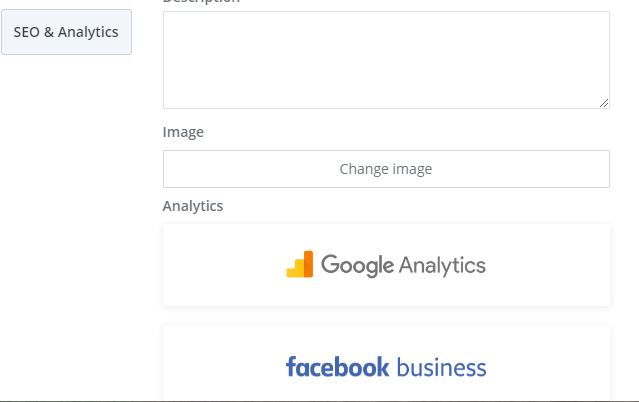
You also have a specific tab for SEO & Analytics integration.
You get options to integrate your landing page with google analytics, Facebook, etc.
Once your Click on publish, Your landing page is live, and the best part is convertkit will host the landing page on their server.
You also get reporting for your landing pages.
We can start with our visual automation now as we have our opt-in forms & landing page.
To start the automation, you may choose the following
You can even map the user’s journey by using
Events– when a tag is added, when a subscriber makes a purchase
Actions– you can move the subscribers to different sections based on their actions.
Conditions- You can add this logic condition where a subscriber matches a specific set of your conditions. You can move them to the next step.
The simplest automation you could set up.
You can add people to a welcome sequence when they subscribe to your email list.
We can use our forms and landing pages for this automation.
You can change each element of the automation by hovering over each step and clicking the edit step button.
You can add events, tags, and conditions at any point by clicking on the “+” symbols.
You can also use pre-built automation templates by convertkit.
To take your automation live, just click on the pause button on the top end on the righthand side.
Go to the subscriber’s page, and you will get a button saying add subscribers.
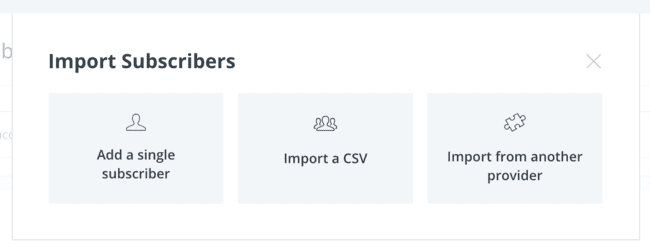
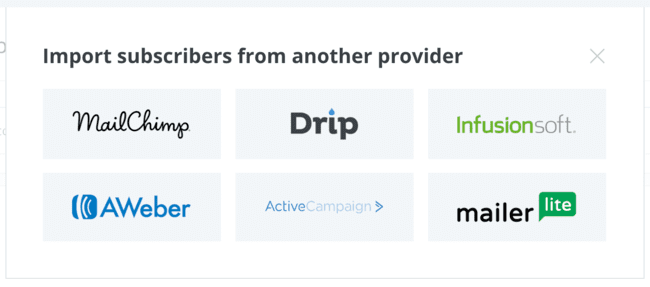
If you have subscribers in another email service provider. You can easily migrate them to convertkit.
It is the easiest and best way to send lead magnets to build your email list. You can set up a new form and offer up a new lead magnet in minutes.
It has the perfect flow for list building.
The user interface is easy & impressive
You can also add your team mates
Reporting is Easier & simpler- you can check open rates, click-through rates, subscribers activity. Everything you need to grow your email list – under one roof and the best part is they have a free trial version for you to check their services. Convertkit is an effective email platform that’s built with your needs in mind – I highly recommend checking out ConvertKit.